Hand History Tool For PKR.Com
- Wiki |
- Downloads |
- Poker Stats |
- Help |
This is a copy of this page that I inteneded to modify based on my own experiences with SVN rather than CVS..
Introduction
This post is dedicated to the .NET head who’s grown up on Visual Source Safe and suddenly finds himself (or herself) in the midst of an open source project hosted by SourceForge. CVS is very different from the check-out, check-in pessimistic locking approach taken by VSS. I hope to demistify it just a bit so you can start hacking away at the numerous .NET based open source projects hosted on SourceForge.
Disclaimer
Keep in mind that I’m basing this on my experience. Although there are multiple Windows CVS clients, I’ve only used TortoiseCVS. However, I’m sure these experiences apply to WinCVS as well.
Software
Before we begin, please download the following tools.
- TortoiseCVS - a Windows CVS client.
- PuTTYGen - Used to generate your SSH keys.
- Pageant
- PuTTY
Generate SSH Keys
The next step is to run PuTTYGen to generate your SSH keys.
- In the Parameters section at the bottom, make sure to select “SSH2 DSA’.
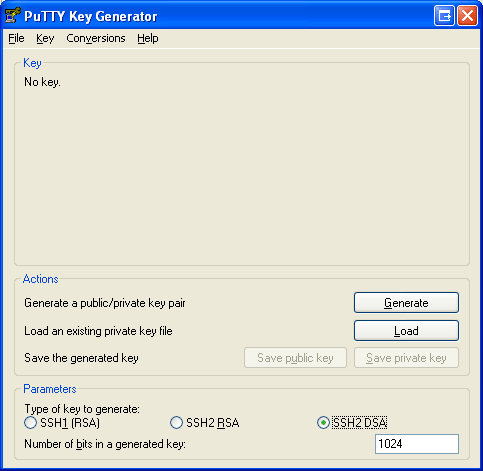
- Click the “Generate“ button.
- Follow the on-screen instructions (“Please generate some randomness by moving the mouse over the blank area“). Key generation will be performed immediately afterward.
- Upon completion of key generation, enter username@shell.sf.net in the “Key comment“ field, replacing ’username’ with your SourceForge.net user name. This comment will help you identify the purpose of this key.
- Enter a passphrase and confirm it.
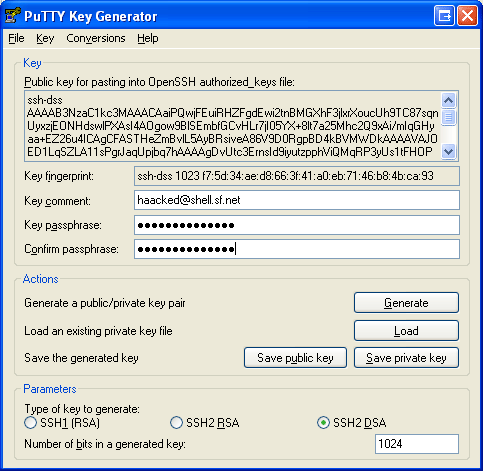
- Click on the “Save Private Key“ button and save your private key (using the .ppk extension) somewhere you’ll be able to find it again.
- Good, now you can post your keys on SourceForge. Keep PuTTYGen open to where it is because you’ll need it later.
Posting Your SSH Keys
The point of this process is so that you don’t have to enter your password for every single CVS file operation. In order to do that, CVS needs a copy of your public SSH key. To do that, make sure you are logged in and...
- Go to your account page.
- Scroll down to the “Host Access Information“ section.
- You should see a section about the Project Shell Server. Click on the “Edit SSH Keys for Shell/CVS“ link.
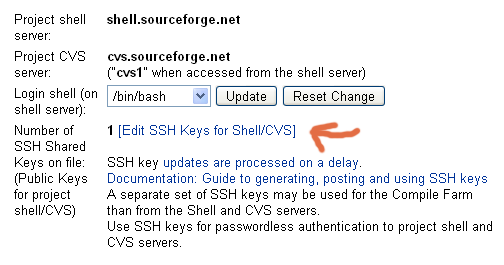
- This will provide a form in which you can post your public key. The
text to post in here is displayed at the top of PuTTYGen in a text box
with the label “Public key for pasting into OpenSSH authorized_keys
file:“
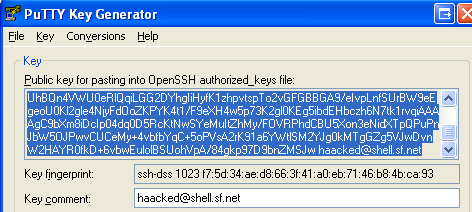
- Make sure to follow the instructions on the page. Multiple keys can be posted, as long as there is one per line.
There is a delay before your keys are fully posted, so be patient.
Getting Pageant Involved
Now is where Pageant gets involved. Pageant is a little service that runs in your system tray. It’s primary purpose is to provide authentication into SSH. It holds your private keys in memory, already decoded, so you can use them without having to enter your passphrase all the time. Instead, you enter your passphrase once when you start pageant.
- After installing and running Pageant, you can double click on its icon at any time. It looks like a computer with a hat on it.
- Simply click on the “Add Key“ button and find the private (*.ppk) file you created earlier. That’s it!
Checking Out A Module
At this point, you are all set to get going.
- Make sure you’ve been added as a developer to the project you’re going to work on. A project administrator would have to do this.
- In Windows Explorer go to the folder you wish to check the code out into.
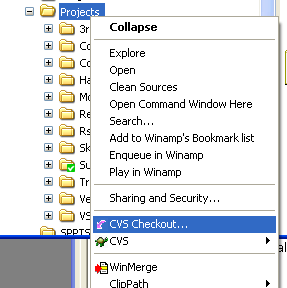
- Right click and select the “CVS Checkout“ command.
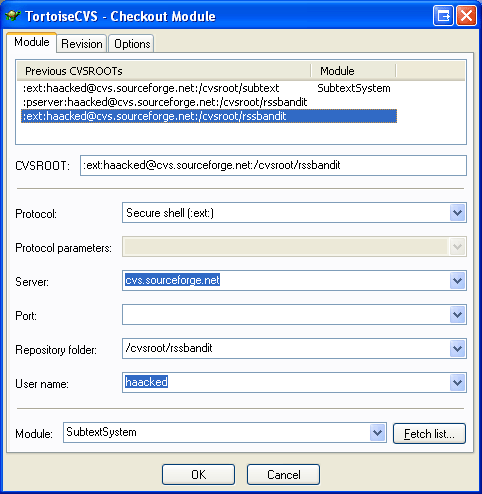
- You will need your username on SourceForge and the project UNIX
name. For example, if your username was “haacked“ (it isn’t, because
that’s mine) and the project you were working on is “subtext“, you’d
enter the following information
- Protocol: Secure Shell (:ext)
- Server: projectname.cvs.sourceforge.net
- Directory: /cvsroot/subtext
- Username: haacked
- Wait patiently as the project is created on your local machine.
Now Write Some Code
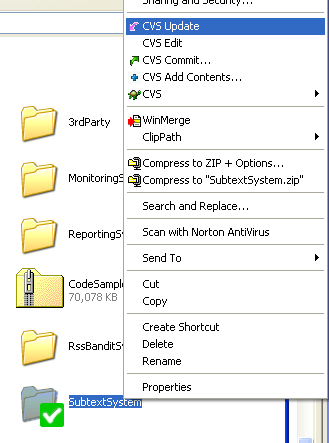
Note that you only have to checkout a module once. Afterwards you can run the update command to get changes committed by other developers. It’s a good idea to do this before and after you make any changes.
Commiting Changes
After you’ve changed some files, their icons be marked with an orange arrow. To commit your changes, right click and select the Commit command. Please make sure to enter an informative comment.
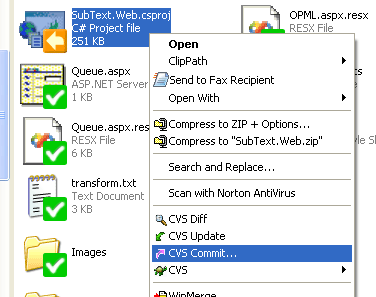
To commit multiple changes, right click on the root folder and select Commit. You’llget a list of all changed files. You can check the ones you wish to commit and commit them in bulk.
Adding Files
If you add a new file to the project, you’ll need to add it to CVS and THEN commit it. To add a file, simply right click on it and select “CVS Add“.
Know when to ignore
TortoiseCVS is not integrated with Visual Studio.NET. Thus it doesn’t know that there are some files you do not want to add to CVS such as *.suo, * and maybe the “bin“ and “obj“ folders. To ignore folders, simply right click on them and select “CVS Ignore“. This will create a .cvsignore file in the directory. It’s probably not a bad idea to add this to the repository so that others don’t accidentally add “ignored“ files.
You can also set ignored files using file patterns within TortoiseCVS’s preferences dialog. Right click on any file and select “CVS“ -> “Preferences“. Under the “Ignored Files“ tab, enter file patters such as *.user.
Submitting Patches as a Non-Developer
If you do not have developer access, you can still submit patches to a project. In most SourceForge project sites, there is a “Patch“ section where patches can be submitted. In order to learn how to submit and apply patches, read the following article “Using a Windows version of GNU Patch.exe with CVS and Diff Files“.
For More Information
- Be sure to read Eric Sink's Source Control HOWTO.
- Also check out the SourceForge site docs. Including...
Conclusion
I hope this gets you on your feet when joining an open source project in SourceForge. If you find any errors, omissions, and such, please let me know so I can correct it.